DIY Rustic Painted Wooden Eggs
Spring Decorating
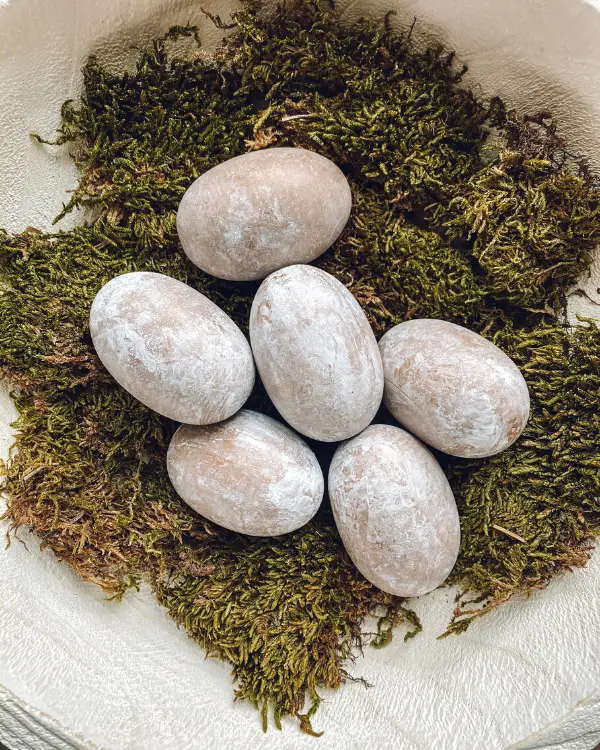
These DIY rustic painted wooden eggs are the perfect addition to your Spring decor! I always enjoy decorating for the different holidays and seasons. It really feels like a way to celebrate them. Changing and adding things according to the seasons keeps things fresh and new in the home and simply adds joy.
(This post contains affiliate links. This means I receive a small compensation at no cost to you. For example, as an Amazon Associate I earn from qualifying purchases. You can read more about it here. Thank you for your support!)
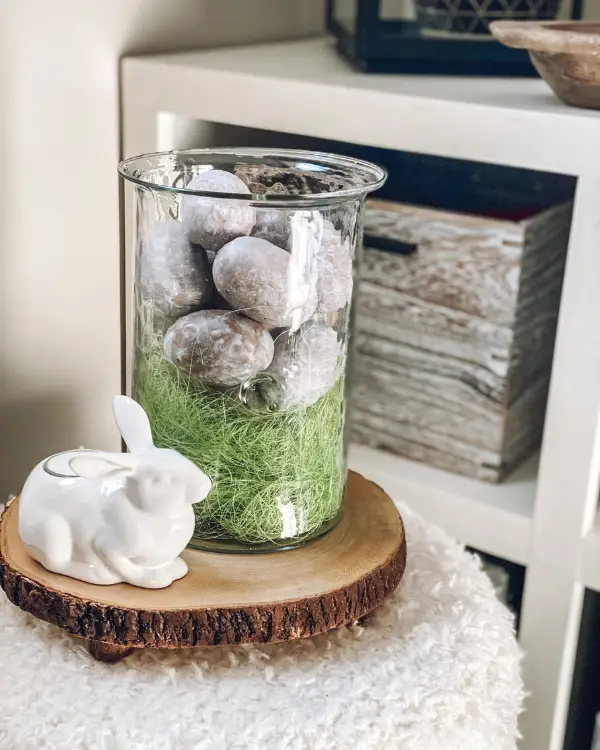
In Spring and for Easter, eggs are one of the biggest ways out there to celebrate! My kids have always enjoyed decorating eggs in bright colors and of course in mixing colors, too, sometimes to a shade of mud lol. However, my go to in decorating in general is colors that are neutral. I’m just drawn to them! So I wanted to create some simple and rustic neutral eggs.
Here’s how to create the look. What’s great about this is you can obviously go the colorful route, too! It’s also a fairly neat project, so even your kids can possibly create some eggs without getting covered in paint themselves!
How do I make diy rustic painted wooden eggs?
Materials
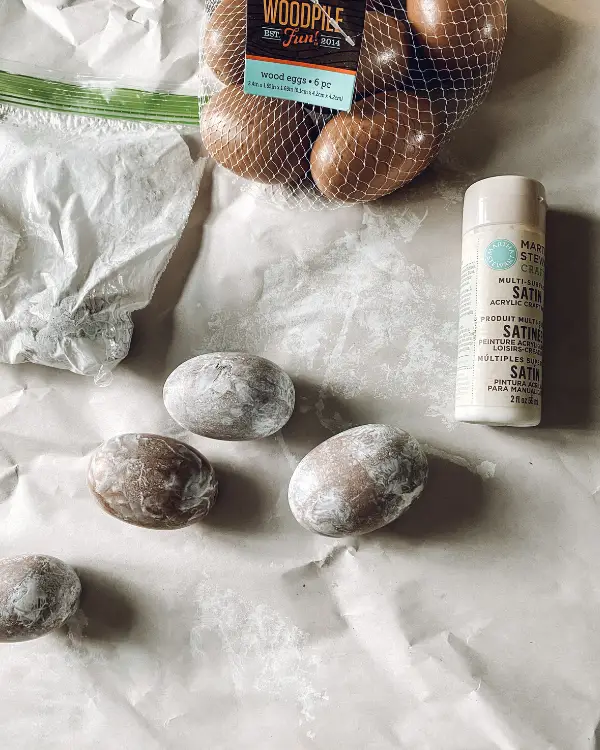
- Wooden Eggs (I got these from Hobby Lobby.) I liked the idea of wooden ones because of their base color, but also because I wanted to use them more than once. However, I’m sure real hard boiled eggs would work, too. Just be careful not to crack them! 😉
- Craft Paint
- Plastic Ziploc Baggie
- Water
- Packing Paper/Newspaper…a place to dry the eggs
Directions
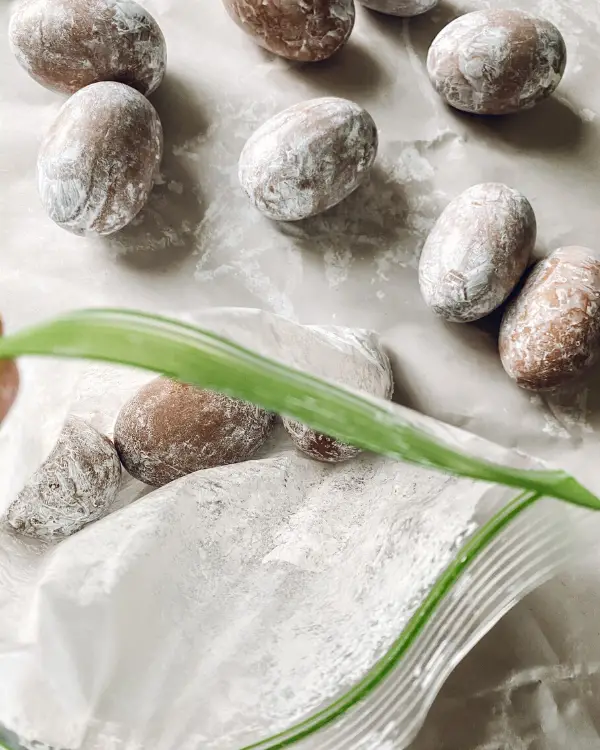
- Squirt a very small amount of paint into the bag and a drop or two of water. You may be adjusting the amount of one or the other as you go to achieve the desired look. There’s no “right” way.
- Add an egg or two, seal the bag and shake, wiggle, squish around, etc…
- Carefully dump the eggs out onto the paper to dry. If you feel like the egg has too much paint on it, crinkle some of the paper on it to dab it off. This also creates a cool effect! (This might be more messy…lol)
It’s that easy! Happy Spring Decorating!


You May Also Like
DIY Valentine’s Day Planter: How to Decoupage with Napkins
DIY Farmhouse Beads